Welcome

Hello and Welcome. My intent is to show how to prepare “elegant” dishes at home and enjoy a little up-scale dining, that doesn’t always require buying the “Top of the line”.

You won’t find any Casseroles, Squash, South West or Mexican here; I tend to stick with New England, European and Chinese food groups as I enjoy them most.

As I have High blood pressure and high Cholesterol, I do not use any salt nor consume any beef or beef products.

My recipes are designed for two adults with an accompanying dish (I hate the word "side" it relegates an otherwise wonderful experience to nothingness). Typically my recipes take 1-1/2 hours or less from start to table (not counting marinating). So with that, let’s get to it.
Showing posts with label Seafood. Show all posts

Tuesday, March 19, 2013

Capellini with Red Clam Sauce


It's the middle of Lent for all the Catholics out there so it's appropriate for a recipe containing no meat for those of you fasting.

I know most of the "food gurus" say to use Linguini, but I have found that the Linguini noodles are excessively starchy and just too bulky. The Capellini (Thin Angel Hair) is much more delicate and holds the sauce well.
 
INGREDIENTS: 
 
1 can (28 ounces) Peeled plumb tomatoes
1 can (6-1/2 ounces each) chopped clams, undrained **
1 small onion
1 Tbsp olive oil
2 garlic cloves
2 Tbsp fresh parsley
1 bay leaf
1/2 Cup of dry red wine
1/2 tspn sugar
1/2 tspn dried basil
1/2 tspn dried thyme
4 ounces Capellini , cooked and drained
PREPARATION:
Drain the tomatoes, reserving the liquid and crush with a potato masher right in the can. Peel the onion and chop finely. Peel the garlic and chop. Wash the parsley and mince chop the leaves.
COOKING:
Put the juice from the tomatoes in a small pot and gently boil (slow bubbling) until it is reduced to 1/3. (about 45 min to 1 hour).
Heat a small skillet, add the oil and sauté onion in until tender. Add garlic; sauté 1 minute longer. Transfer to a pot, stir in the crushed tomatoes, parsley, bay leaf, sugar, basil, and thyme.
Cover and cook on low for 2 hours, Add the reduced tomato juice. Drain the clams and add the juice to the pot, stirring to combine. Continue a slow simmer for another hour, adding the clams about 15 min. before serving.  Discard bay leaf.
While the sauce is cooking, cook the capellini according to package directions or until al dente
Serve the sauce over the Capellini. With extra sauce served along side.
 

**Bar Harbor brand "Chopper Clams" for this recipe were purchase from Amazon.com as they are outstanding and about as close to fresh as you can get.

Saturday, September 15, 2012

Shrimp with Red Pepper in Garlic Sauce

Red Peppers, the ripe form of green peppers, No not the hot ones, but the s-w-e-e-t variety that seem to be left out in the realm of cooking. Grind them in a sauce, chop them so finely you can't tell they are in the dish.
So here's a recipe I have developed to blend their sweet crispiness with succulent shrimp. I do hope you enjoy.

INGREDIENTS:
¾ pound Shrimp 16-20/lb. (raw)
¼ pound Capellini (Angle Hair) spaghetti
1 large Sweet Red Pepper
1 large clove garlic
1/8-¼ tsp crushed red pepper flakes
2 Tbsp olive oil
1 tsp parsley
1/3+ cup white wine
1 Tbsp grated Parmesan cheese
Fresh parsley sprigs for garnish

PREPARATION:

Wash the shrimp, peel removing the vein and tail shell. Prepare the red pepper flakes (Note: crushed red pepper can be substituted, but the seeds mess up the presentation).

Wash the red pepper, carve and cut it into 3/4 ” squares. Wash the parsley and shake off the water; cut from the stem and chop 1 tsp. Peel and chop the garlic do not use a press.

COOKING:

First cook Capellini , drain, rinse and put it on a serving platter, cover with a foil tent to keep it warm.

While it is cooking, heat a heavy skillet medium hot, 'till the rim is hot to the touch add the oil and let it heat. Add the garlic and pepper flakes, reduce heat, sauté until the garlic just starts to turn light brown. Add the red peppers and chopped parsley sauté a few min. then add the shrimp,. Sauté until shrimp become firm and opaque (about 2 min. per side). Remove the shrimp and peppers with a slotted spoon to the waiting Capellini  and re-tent.

Add a splash of white wine (1/3+ cup) then deglaze the pan over moderate heat. reduce to about 3/4 and pour over the shrimp/peppers and sprinkle with the Parmesan.

Garnish with parsley.

Saturday, March 31, 2012

Cumin/Pepper Crusted Chilean Sea Bass

Chilean Sea Bass is a wonderfully rich fish and needless to say, there are innumerable ways to prepare it. However combining it with the ancient spice, cumin seeds adds a twist of middle eastern flavor to it by pan searing the fish crusted with the cumin then roasting to juicy tenderness.
Just as an aside cumin has been used to spice foods from biblical times.

INGREDIENTS:

2 (6-ounce) Chilean sea bass fillets
1 Tbsp cumin seeds
1 tsp whole black pepper corns
1 Tbsp extra virgin olive oil
2 lemon wedges
¼ cup of dry white wine
1 Tbsp chopped fresh parsley

PREPARATION:

Wash the bass and check for bones. Remove the skin if present. Pat dry and set aside. Coarsely chop the parsley.

Toast the cumin seeds in a large dry cast iron skillet over medium heat until lightly browned and aromatic (this will take about 10 minutes). Place pepper corns in a spice/coffee grinder and process several times. Add the toasted cumin and process until finely ground. Scatter about half onto a plate, then place the bass fillets top-up and rub spice mixture in. Sprinkle the remainder over the top and press in with the back of a spoon or spatula.

Preheat oven to 375° while toasting the cumin, about 15 min before cooking.

COOKING:

Preheat a cast iron fry pan over med-high heat (7-8). When the rim is hot to the touch, add the olive oil to pan letting it heat just 'till a whiff of smoke arises. Add the bass; searing the bottom and then the top, for 2 minutes on each. Then sear the sides for 1 min each.

Place the pan with the bass into the over and roast 375° for (8-10 min. for 1-1/4" thick) Desired internal temp: 130° no less, when tested with an instant read thermometer. Transfer the bass to plates. Cover with aluminum foil tents.

Deglaze the pan with the wine reduced to about ½ and pour over the bass then sprinkle with parsley.

PRESENTATION SPECIAL: Slice 2 thin slices of lemon and thread a stalk of parsley thru the center of the lemon.

Adapted from Cooking Light, Dec. 2001

Wednesday, November 2, 2011

Grilled Key Lime Shrimp

There are so many recipes for grilling shrimp, why do another? Well simply put, I have a Key Lime tree and they are in season in abundance. Although this recipe calls for key limes, I'm sure that a conventional lime can be substituted, However the key lime does have a distinctly different flavor and the shrimp will taste different.

INGREDIENTS:

1 pound large shrimp 16-20/Lb.

MARINADE:

Butterflied Shrimp

2 Tbsp light rum
2 tsp Key Lime juice
2 tsp extra virgin olive oil
1 garlic cloves
1/8 tsp red pepper flakes

GLAZE:
1 Tbsp dark brown sugar
1 tsp balsamic vinegar
1 Tbsp light rum

PREPARATION:

If using bamboo skewers, soak them in water for 30 minutes before grilling (about 8 needed).
Slit the shrimp down the back to butterfly, then peel, removing the vein and tails, wash and pat dry. Place them in a zipper bag.

Juice the key lime. Peel the garlic and squeeze with a press. Prepare the Red Pepper flakes. Place all the marinade ingredients in a bowl and mix well, then add to the bag. Massage the shrimp to distribute the marinade, refrigerator 30 to 60 minutes.
Prepare the chimney starter and set it ablaze 15 to 20 min. before grilling
In small bowl, combine brown sugar, vinegar and remaining rum.
Remove the shrimp from the marinade and thread them on skewers. I only used one skewer in the picture, but two work better with the butterflied shrimp.

GRILLING:

Dump the starter into the grill spreading the coals a little. Replace the grill grids and allow them to heat for a few minutes. Coat the cooking area with olive oil.
Place skewers on a grill grids and grill for about 2-3 minutes until slightly charred , brush with the glaze as they are grilling. Turn them over and brush on more glaze. Grill another 2 to 3 min. They are done when they are firm and opaque.
Garnish with key lime wedges.

Monday, October 17, 2011

Cajun Blackened Salmon

Pan blackened salmon with a Cajun twist on flavor. With so many ways to prepare salmon, this one is easy as the spicing is all in one container from Zatarain's. Sprinkle it liberally for a great Cajun taste.

INGREDIENTS:

2 Salmon fillets 6 to 8 oz.
Zatarain's Blackened Seasoning
1 Tbsp. extra virgin olive oil
fresh ground black pepper
olive oil spray

PREPARATION:

Wash the salmon thoroughly and trim off any fat around the edges, and pat dry with a paper towel. Lay the salmon onto a plate or cutting board and spray a light misting of olive oil spray, or a light coating of olive oil.

Grind on some fresh black pepper and a lot of Blackened Seasoning. It is quite SPICY! The more the better. So give the fish a nice, even coating of blackened seasoning.* Try to get some on the sides of the fillet as well. And finish up with one last misting of that spray olive oil. The spray keeps the spices in place when putting the fish in the pan.

COOKING:

Place a heavy frying pan on the burner and set the heat on medium high (7 to 8)

When the rim is hot, drizzle a tablespoon of olive oil into the frying pan. Allow it to warm, then gently lay the fish into it, flesh side down. Leave it there for a 5 to 7 minutes (1" thick) without moving it.

After 6 minutes, lift the fillets and look at the underside of the salmon. If it’s as dark as you want it, flip it over onto the skin side. Continue frying for 2 to 3 minute or so, then turn the heat down to very low or off and letting the residual heat gently finish cooking the middle, 3-5 minutes should do it. Scoop out and serve.

*Several shakes of the blackened seasoning are needed to get the full flavor.

Sunday, January 16, 2011

King Crab Legs

 Updated 4/13/13

King Crab Claw 3/4 pound
A little history here. My first encounter with King Crab was in a small place in Connecticut where I lived and worked after graduating. At the time, I was somewhat unimpressed - after all I was in "Lobster country" and crab just wasn't "as good" so the old saw went.

Well since moving to Arizona a number of years ago, we have grown to truly enjoy King Crab Legs. I don't even order Lobster when I travel to the shores of the Atlantic for a visit. They just aren't as tasty any more.

When buying king crab, the red Alaskan King crab should be our first choice.

King crab legs are measured by how many crab legs it would take to make 10 pounds. A size "12-14" means you will get about 1 leg per pound. That's BIG! I prefer to purchase the "right" or large claw as it yields the most meat. About a pound per person is more then enough.

PREPARATION:

First thaw the frozen crab legs overnight (24 hours) in your refrigerator. Slightly squeeze the middle of the center section to make sure the king crab legs have thawed.

Melt about 1/4 lb of unsalted butter per 2 lbs of crab legs (about a pound per person) for dipping.

COOKING: STEAMING:

Since King Crab leg have already been cooked before freezing, we are only reheating them. Over cooking makes them mushy and soggy.

Select a large "roaster" type pot with a rack long enough to fit the legs. Add water to the pot just to the bottom of rack or grate. Tightly cover the pot and bring to a full boil. Place your crab legs on the rack or grate. (You can bend, but DON'T break the legs to fit into the steamer) after it returns to a boil reduce the heat and steam for 5 to 7 minutes.

Serve accompanied by a small cup of hot melted butter to dip the crab meat into. (The Chinese handle-less tea cups work excellently for this)

GRILLING KING CRAB LEGS:

Light your charcoal in a chimney starter. After the coals are flaming, spread them around and then Preheat the grill. The grill and grates should be hot before you cook to prevent food from sticking. Coat the grids with olive oil.

Add the legs to the grill and cook with the lid open for about 5 minutes on each side at a medium heat say 350 degrees or so. Turn occasionally. They are done when the ends are a nice solid white and you can smell them. The sweet odor of crab tells you they are ready to serve.

Serve with a small cup of drawn unsalted butter.

EATING KING CRAB LEGS:

Break them apart at the joints by bending them backwards, being careful of the sharp pickers on the shells. Using a fork, work it by inserting one fork tine into the end of the crab leg, then working the fork up the length of the shell, you can open the leg and extract the meat.

Place the meat in the warm butter and continue extracting the meat.

Alternately a nut cracker, knife, Lobster Crackers and even hammers can be used to break the shell.


Tuesday, January 11, 2011

"Steamers" Steamed Soft Shell Clams

Being a native New Englander, one of the things I miss most is Steamed soft shell clams or “Steamers”. Especially the beauties from the clam beds of Ipswich, Mass. The Steamed clams that can be gotten here on the dusty roads of Az. are sorely lacking, as most often they are hard shelled Cherry Stone clams, much tougher and certainly not as sweet.
New England fish markets have soft shelled clams most of the year, but so far I haven't found a way to get them here as they are fragile and don't keep well.
Steamers are more casual then Gourmet, but these bivalves are "out of this world". Serve them with lots of napkins and a good bottle of beer. My preference is Fullers ESB ale, stout enough to stand up to the clams.

INGREDIENTES:

2-3 pounds soft shell clams (for 2)
1 stick butter (Unsalted)

PREPARATION:

Proper cleaning of the clams includes rinsing them in a colander under running water followed by an hour or two in a bucket full of water, gently stirring occasionally (the shells break easily) then draining the water. Repeat this until little or no sand is left in the bottom of the pail. Any clams that are open and don't respond to a touch should be discarded as they are dead.

STEAMING:

Add an inch of water to a large pot and bring to a boil, add the clams, tightly cover and reduce heat. At the same time, melt the butter in a small pan. Allow the clams to steam them until they open, about 5 minutes or so. If all the clams are not open, continue steaming, checking every minute or so. Remove the clams to serving bowls with a slotted spoon. (You can remove them as they open).

The liquid (broth) should be gently poured in cups, leaving the sand in the pan, and served along side the clams. Divide the melted butter among small bowls and served along side the clams

EATING:

Remove the clam from its shell, you may have to dislodge the muscle to the shell. Then peel the black skin off the neck. Dip the clam using the neck as a handle into the broth and swish it around a bit to dislodge any remaining sand. Then dip it in the butter. Sipping the broth adds to the flavor.

Mix up a nice tossed salad and serve along side.

Tuesday, December 14, 2010

Baked Sole with Asparsagus

This is a very easy meal to prepare. The longest is peeling the asparagus. And no the asparagus does not taste fishy.

INGREDIENTS:

2 large or 4 small sole or flounder fillets, 3/4 lb.
1 lb. asparagus, smaller-size stalks
freshly ground pepper
1 Tbs. unsalted butter
Zest and juice of 1/2 lemon
1/2 Tbs. all-purpose flour
1/2 cup chicken broth

PREPARATION:

Wash the Asparagus and cut I” off the bottom. Peel the stem below the leaf buds. Wash the fish, removing any fat and check for bones. Butter a shallow 9-by-13-inch baking dish.

Preheat an oven to 425°F

Arrange the asparagus spears in a single layer in the prepared dish and season lightly with salt. Season the fish fillets on both sides with pepper and place them on top of the asparagus. If smaller, overlap pairs of fillets to make single thicker portions

COOKING:

Bake until the fillets are beginning to flake at the tail ends and the asparagus is tender-crisp, about 10 to 12 minutes, depending on the thickness of the fillets.

PREPARE THE SAUCE:

Meanwhile, in a saucepan over low heat, melt the butter with the lemon zest. Whisk in the flour and cook, whisking, until the mixture just begins to color, about 3 minutes. Add the broth and lemon juice and whisk vigorously to break up any lumps. Cook the sauce, whisking occasionally, until thick, about 7 minutes. Season with pepper.

Spoon the sauce over the fillets garnish with lemon slices or parsley and serve immediately.

Sunday, December 5, 2010

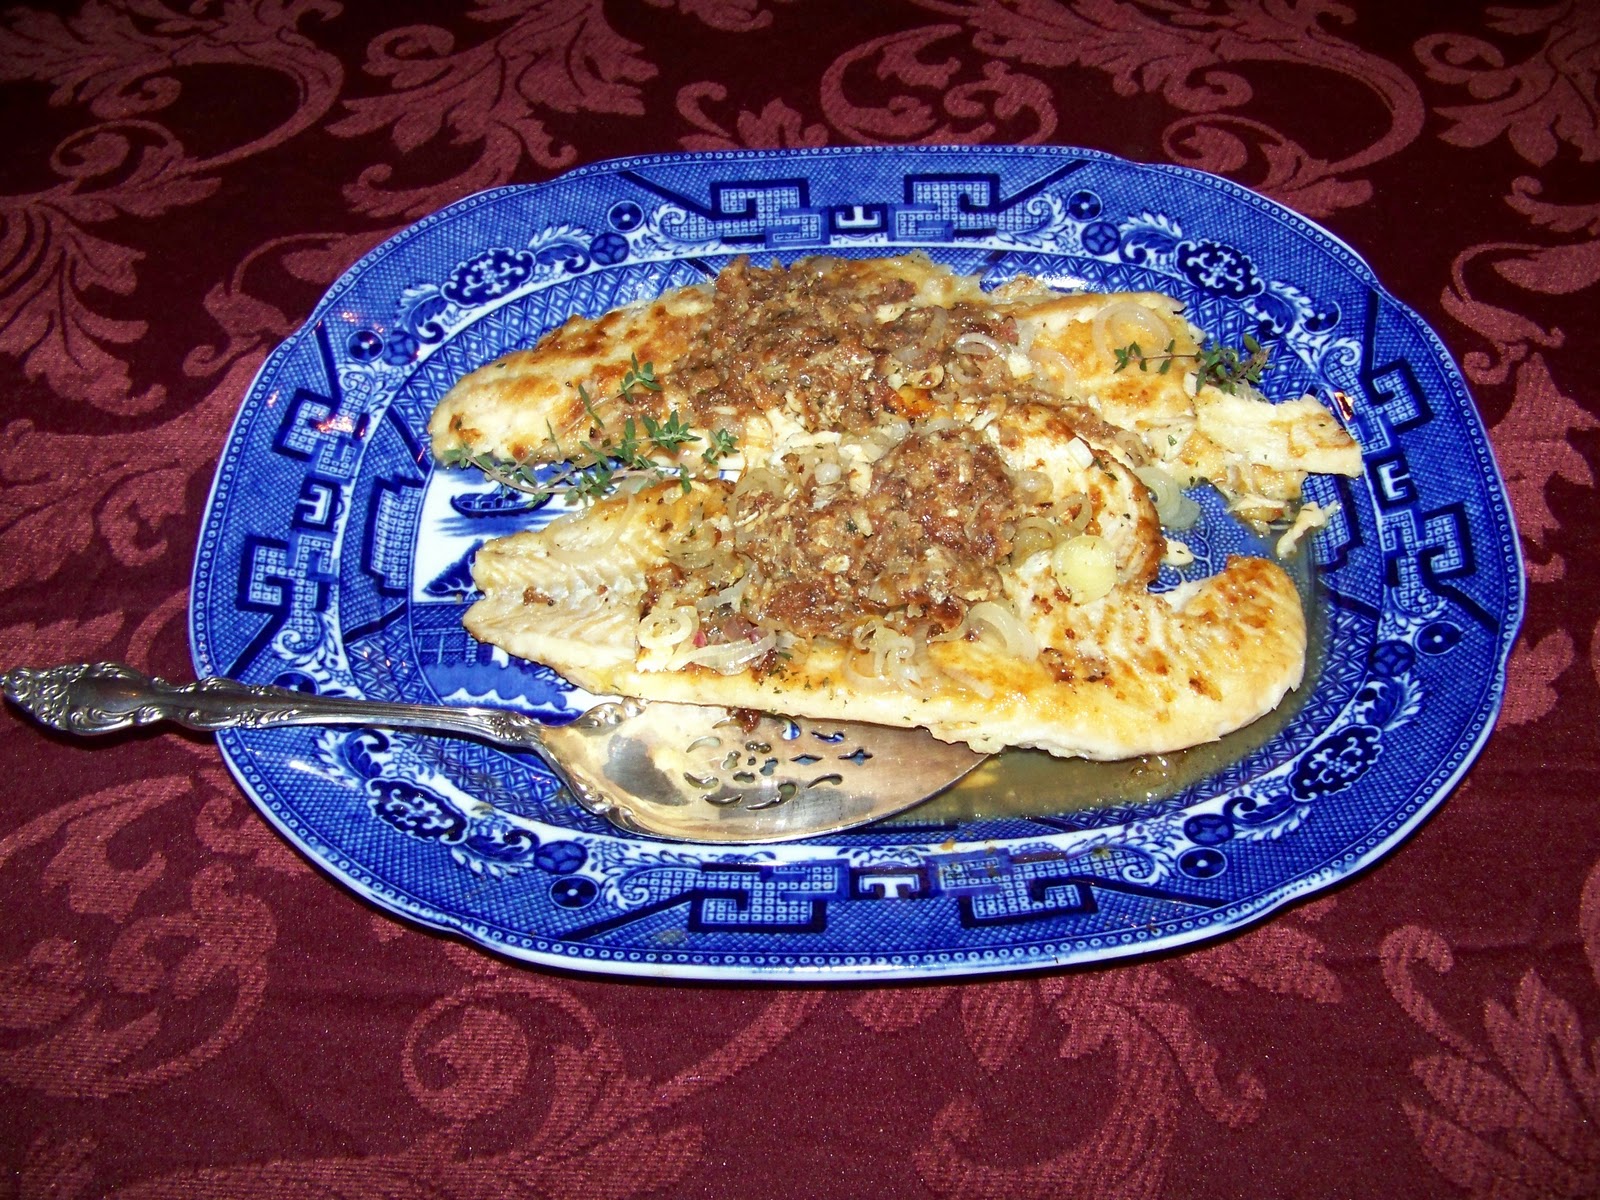
Pan Seared Haddock with Shallots

Haddock is a wonderful salt water fish, very mild in flavor and much less (fishy) then Cod. The searing forms a wonderful crust that adds so much to the enjoyment of this dish.

INGREDIENTS:

2 haddock fillet, 6-8 ounces
2-3 tsp fresh thyme
2 shallot (medium)
2 Tbsp butter
2 tsp Extra virgin olive oil
4 Tbsp pancake mix Aunt Jemima)
1/2 tsp fresh ground white pepper
1/4 cup dry white wine

PREPARATION:

Wash the fillets, remove any bones and cut off any waste; pat dry Grind a little pepper on the fillets. Then grind the 1/2 tsp white pepper on a medium dish and add the pancake mix. Dredge the haddock to evenly coat all sides. Gently shake off any excess. Wash the thyme, shaking off the water. Strip the leaves from the stalks and chop finely. Peel and thinly slice the shallots through the diameter.

SEARING:

Set a small skillet over medium heat, when just warm to the touch of the rim, add the butter. Allow the butter to melt, then add the shallots and thyme to the pan and stir, but don't let the butter burn.

At the same time, set a large non-stick skillet on Medium-High. When the rim of the pan is warm to the touch, add 2 tsp olive oil to coat the skillet. Wait for a faint smoke from the oil: then add the haddock flesh side down.

When sides turn white about 1/3 to 1/2 of way up (1 to 2 minutes); carefully turn them over. Lower the heat and add the shallot/butter/thyme mixture to the skillet. Baste the fillet and continue cooking until temperature of 130 is reached (another 1 to 2 min). DO NOT overcook as the fish toughens quickly.

Remove the fillets to a serving platter. Deglaze the pan with the wine scraping up the bits from the pan bottom as it reduces. Pour over fillets and garnish with thyme sprigs.

Wednesday, October 27, 2010

New England Clam Chowder

For our first stop, it’s Cape Cod for some delicious Clam Chowder. This is the real thing! NO bacon, no spices just the wonderful flavor of clams in a rich creamy broth. We have enjoyed it for many many years and have even dug the clams fresh at one time on the Cape.
Once you’ve tried it, you’ll make it time and time again.

INGREDIENTS:

½ Pound shucked Little Neck Clams
¼ Pound salt pork
1 cup clam juice (fresh or bottled)
½ cup water
2 medium shallots
¼ tsp ground white pepper
2 cups potatoes
2 cups heavy cream
Parsley for garnish.

PREPARATION:

(If you are using freshly dug clams see below) Check the clams for sand and bits of shell then coarsely dice them. Cut the salt pork into four equal pieces. Peel and mince the shallots. Wash, peel and cut the potatoes into one inch cubes.

Place the clams, shallots, salt pork water and clam juice into a large stock pot. Bring just to a slow boil and simmer for 20 min. Add the potatoes and pepper and continue simmering for another 15 min. or until the potatoes are soft.

Add the cream and return the pot to simmer. Now just let it stand covered for 3 to4 hours. For the flavor to develop. Reheat to a simmer (careful not to burn it) and then serve it up in bowls.

Garnish with freshly chopped parsley.


Notes: If you're using freshly dug clams, place them in a bucket of water and sprinkle the washed clams with some corn meal the night before. Refrigerate overnight; this will allow the clams to flush out the sand. Don’t use any clams that are open as they are “bad”. Steam them ‘till they open and shuck them. Reserve the liquid.

We prefer a thinner Chowder, but if you prefer, Common Crackers or Crown Pilot crackers can be crumpled in after serving. Do NOT use oyster crackers as they are way too salty. Alternately, 1 tablespoon all-purpose flour may be added during preparation, but it isn’t recommended.

Tuesday, September 28, 2010

Lobster, Cooking and Eating

Yes It's Ours!
Lobster: Real lobster from the north coast of New England's Cold water, claws and all. Not, Spiny lobster without claws, not Rock crawfish passed off as Lobster Tails. Truth be told, they are warm water in origin and don’t hold a candle to the real thing! Often tough.

Well I feel a story coming on! When I was a young fella, my buddies and I rented houses on Cape Cod for the summer. We were working in Connecticut at the time and would drive up there on weekends to party. Normal Sunday dinner was a bushel of little neck clams -steamed, another of corn on the cob and a 2-½ to 3 pound lobster each. We’d cook them outside over an open fire.

Ok Ok I know, where am I going with this? Well simply put I (we) my wife and I have purchased, cooked and dismembered at least three of those buggers in the 16 pound class. So I think that I speak from experience of how and what when it comes to LOBSTER.

Well first off size has nothing to do with tenderness. A 16 ponder is just as succulent as a “Chick”. And I’ll accept a duel over that statement! Buy a Hard shell lobster as they have more meat than soft shell lobsters. The old adage is only buy in the months with an “R” in it their name as that’s when they are not molting (loosing their shell). Look fore black mottled areas under the claws. Also select a male as the will have larger claws and smaller tail.

OK let’s get to it. First cooking such a behemoth is no different then a small fry (“chicks”). Make sure it’s alive! My kids actually feed one lettuce on the floor in our kitchen while we waited for the time to come to cook it. Buy the way they DO NOT make any noise as you put them into boiling water.

Get a really big pot of water to boiling then put it in head first. You may have to pry the claws off the sides of the pot in the process, but you’ll preserver. Wait ‘till the water starts to boiling again and then set your timer for 10-12 min. for 2 Lbs. and under. For the big one, 20 min. or more.

When the time is up, get a crane to haul it out and onto a dish - no I mean a huge platter.

Now the fun starts- First, take a fork (just a table fork) and pierce the membrane at the base of the tail several times. Pick up the back and bend the tail back until it snaps apart from the body. Pull it out as it will have meat attached to it as it comes out. Set it aside for now. BY THE WAY THIS ALL APPLIES TO EVEN THE SMALLEST OF THEM.

Moving on; also pierce the same membrane where the large claws connect to the body and again break them off and set aside. (Messy isn’t it?). OK so now we have the fella dismembered and can be served to your guests - But! They may not know what to do.

OK OK take the tail and tear out the center flipper at the far end. There will be a eatable flipper meat there, but never mind, Simply take the entire tail section in your left hand and endeavor to straighten it out the best that you can. Now stick your index finger in that place where you pulled off the flipper and push hard! I mean put some effort into it. The entire tail meat should slide out the end where you broke it off of the body.

Now to the claws; Take each claw and again pierce the area where the arm joins the claw and break it backward, separating them. Take a fork and stick one tine into the opening at the base of the claw and work it like an old fashioned can opener right up to the side claw. You should now have basically a slot up the bottom of the claw. Just take the shell and break it open again using the fork tine. Right there in front of you is the most tender piece of meat in the entire critter! Dip it in some butter and chow down.

Each of the segments of the “arms” can be opened in the same fashion accessing the meat inside. The auxiliary arms can be removed from the body by again piercing at the juncture with the body and “can openering” them in turn. On the really small ones, just suck out the meat.

OK now how far do you want to go? There’s still a lot of good tender meat remaining in the body. ……If you are up to dismembering it?

If so read on!

OK (I like that word here) Pick up the main body and turn it over right side up. Grab the shell at the back end while holding the lower part of the body and peel off the top shell. Sorry, there’s no meat here, but if you have access to running water, flush the inner body section so as to see what you’re working on.

Now all cleaned up, head for the junctions of the claws with the body, there you will find quite a bit of very tender meat, Again with your fork, pry open the containing white cartilage and pull out the meat.

Well you have the idea by now, just keep digging for treasure.

Lobster CRACKERS - not necessary, they just crush the meat!

OH by the way use unsalted butter!

Sunday, September 26, 2010

Grilled Columbia River Salmon

The Coho salmon I grilled came from the Columbia River, the best we can get here in Arizona. The capers are essential as they add just the touch on texture.

INGREDIENTS:

3/4 to 1 lb Columbia River or other wild salmon filet (Not Sockeye Salmon)
1 lemon
2-1/2 Tbsp extra-virgin olive oil
2 cloves garlic
dash cyan pepper powder
1 Tbs. capers, drained
pepper grinder

PREPARATION:

Press the garlic in garlic press. Cut 3 thin slices from the center of the lemon then cut in half. Juice the ends of the lemon, drain the capers.

Wash the Salmon thoroughly, checking for bones. Cut off any visible fat then pat dry and set aside for now. Add juice lemon, olive oil, garlic and cyan pepper to a glass dish large enough to hold the salmon filet and mix marinade thoroughly. Place filet flesh side down on marinade. Rub a bit of the marinade on the skin side, cover and let sit for 30-45 minutes.

Prepare your chimney starter and set it ablaze. When fames are coming out the top, dump it into the grill at one end only. Put the grill racks on the grill and let them heat for about 5 min. or so. Coat the end over the coals with olive oil.

GRILLING:

Place salmon flesh side down on the oiled grid. Grill for 3 minutes to sear. Coat another area of the grill grids away from the coals, turn the salmon skin side down and move it to the newly oiled area. Close the cover and roast covered for 5-10 minutes. The salmon is done when the temp. gets to 130 – 135 deg. or when the surface of filet is pink and not glassy.

Carefully remove salmon from grill to a platter; arrange the lemon slices around salmon on platter. Grind on pepper to taste, and garnish with a generous tablespoon of capers. Serve immediately.

Friday, August 27, 2010

Scallops in Garlic/Red Pepper Sauce

Here is an interesting combination featuring three of my favorites, Scallops, sweet Red Peppers and Angel Hair Spaghetti.

INGREDIENTS:
¾ to 1 pound fresh or frozen scallops (Sea or Bay)
¼ pound Angel Hair spaghetti
1 Sweet Red Pepper
1 large clove garlic
¼ teaspoon crushed red pepper flakes *
2 Tbsp olive oil
1 tsp parsley
White wine
2 tablespoons grated Parmesan cheese
Fresh parsley sprigs for garnish
PREPARATION:

Wash the scallops; if using large sea scallops, slice through the diameter into 3/8” discs. Wash the red pepper and cut it into ½” squares. Wash the parsley and shake off the water; cut from the stem and chop 1 tsp. Peel and chop the garlic do not use a press.

COOKING:

First Cook Angel Hair, drain, rinse and put it on a serving platter, cover with a foil tent to keep it warm.

Heat a skillet medium hot, add the oil and let it heat. Sauté the garlic and pepper flakes until the garlic just starts to turn light brown. Add the scallops, red peppers and chopped parsley. Sauté until scallops become firm and opaque. A splash of white wind adds just a bit of flavor.

Serve the scallops and peppers over Angel Hair; Pour any remaining sauce over and sprinkle with the Parmesan.

Garnish with parsley.

*See Tips

Sunday, August 1, 2010

Shrimp with Marsala/Garlic Sauce

Well here it fresh off the press, last nights bill of fair.

INGREDIENTS:

3/4 pound large RAW shrimp (16-20 per Lb.)
2 Tbsp extra virgin olive oil
2 garlic clove
4 tsp minced fresh parsley leaves (divided)
3 Tbsp fresh lemon juice
1/3 cup Marsala wine
Pinch fresh ground white pepper

PREPARATION:

Wash, peel and devein the shrimp removing the tails. Peel and mince the garlic (do not use a press). Mince the parsley, ½ finely and ½ coarsely for garnish. Squeeze the lemon juice. Measure the wine.

COOKING:

Heat a sauté pan over a medium hot burner 'till the rim is warm, add oil and continue until it is hot but not smoking, add the garlic and 2 teaspoons of the parsley, and cook the mixture stirring over moderately high heat until the garlic is lightly browned.

Stir in the lemon juice, the Marsala, and pepper to taste. Add the shrimp, and cook them, stirring, for 4 to 6 minutes, or until they are just firm.

Transfer the shrimp to a heated platter, spoon the sauce over them, and sprinkle with the remaining parsley.

Friday, July 30, 2010

Salmon Au Beurre Noir

This is an old recipe from the 1880’s often served in the old west towns and has been brought up to today’s standards

INGREDIENTS:

1 lb Salmon (Columbia River) fillet*
1 Tbs. capers
1 onion, sliced
4 Tbs. white wine vinegar (Divided)
2 oz unsalted butter
few sprigs fresh parsley

For garnish:
Fresh chopped parsley

PREPARATION:

Rinse the Salmon fillet and pat dry. Peel and slice the onion, rinse and chop the parsley.

COOKING:

Put the Salmon into a large frying pan and cover with pure cold water. Add the onion, half the vinegar and the parsley. Bring to the boil, reduce the heat and simmer gently for 15 minutes.

While the salmon is simmering, melt the butter in a medium skillet over medium-high heat. Cook until the butter turns rich golden brown and gives off a nutty aroma (This is called beurre noir in French, and translates as “black butter.”) Add the remaining vinegar and capers and boil for 1 minute.

Take the salmon out of the pan when it’s time, removing any bones and cut into 2 pieces. Place in a warmed serving dish. Pour the beurre noir over the fish and sprinkle with parsley.


* note the Columbia River king salmon is best, is more delicate, with subtle and delicious texture and flavor.

Monday, July 26, 2010

Mesquite Grilled Shrimp

INGREDIENTS:

1 pound jumbo raw shrimp (16 to 20)
½ tsp red pepper flakes *
1 large clove of garlic
1 Tbsp olive oil
Lemon cut in slices for garnish
fresh parsley for garnish
5 - 6 Bamboo skewers

PREPARATIONS:

Place the skewers in water and soak for at least an hour, along with the Mesquite chips (drain just before grilling).

Peel the shells from the shrimp, remove the legs and tail shell, clean out vein. Wash and pat dry. Mix the oil, garlic and red pepper and place in a plastic zipper bag with the shrimp for about ½ hour. Wash the parsley and cut the lemon.

Using a chimney starter, start the charcoal about 15 min. before grilling. Thread 4 shrimp on each skewer while the charcoal is starting.

GRILLING:

Spread the coals out, scatter the mesquite chips ** over the coals and replace the grill racks. Coat the grill racks with olive oil.

Place the skewered shrimp on the grill and grill with the cover closed over low to medium coals of charcoal until meat is pink, about 4 minutes, turn and grill another 4 min. They are done when they resist pressure and are firm.

Serve the shrimp on a platter garnished with lemon slices and parsley.
*See Tips
**
Note: The smoke box won't work here, It doesn't have time to even dry the chips out.

Trout Almandine

INGREDIENTS:

2 Fillets (6-8 ounce) trout, skin on
2 Shallots (3-4 if small)
White pepper freshly ground
1/3 cup white wine
4 tablespoons butter
¼ cup blanched slivered almonds
2-½ tablespoons lemon juice
½ tablespoon chopped fresh parsley
parsley stems for garnish
6 wedges lemon, for garnish

PREPARATION:

Rinse the trout, scraping the skin side with a sharp knife to remove any loose scales. Trim and visible fat and rinse again and pat dry. Season with white pepper to taste. Place in refrigerator ‘till ready to grill.
Rinse the parsley and chop the ½ Tbsp finely. Juice the lemon.
Peel the shallots, and cut into thin disks.

COOKING

Heat a medium shallow sauce pan and melt 2 Tbsp. of butter. Add the almond slivers and toast ‘till a light brown. Add the 2-1/2 Tbsp of lemon juice, the 1/3 cup of wine and the chopped parsley. Stir over low heat until well blended. Just keep it warm, not bubbling.
Heat 2 tablespoons butter on a large griddle over high heat (375) until melted. Spread the shallots on the griddle and saute just till brown. Push them to the back, spread more butter on the griddle and ad the trout flesh side down. Spread the shallots over and around the trout, so they flavor the fish. Grill for 2 min. no longer. Scrape the shallots to the back of the griddle.

(USING A LARGE FLIPPER) Turn the trout skin side down and cover with the shallots. Grill over medium heat (350) ‘till the thickest part is just firm and resistant to pressure (springiness) about 3-4 minutes Remove trout to serving plates.
Assemble the shallots to the back of the plates. Spoon the Almond sauce over the Trout. Garnish with the Lemon wedges and the Parsley.
Serve immediately
Related Posts Plugin for WordPress, Blogger...